We recently touched on this in a feature of week, but here’s a little more detail on creating your own reporting parameters. Our goal at SnailWorks is to give clients a wide variety of ready-to-go reports that will meet most of their needs. We think we have pretty good instincts as to the reports most people need.
Still, there are some measures we cannot anticipate. Sure, you can see when the mail in Indiana was delivered, and drill from there to every Zip Code in the state. But has the mail for your Kokomo location been delivered? How about Marion? Are you getting the delivery you expected in the Midwest District? That’s where User Defined Fields (UDF) come into play.
Every record in a SnailWorks mailing file includes five extra fields for you to define and use. Six, really but we’ll get into that in a minute.
User defined fields 1-3 are for grouping. In the example above, each store could go into a UDF. You name the field (I’d go with “Store”) and then populate the field in each record with the store that record is associated with. You could then add another UDF called “District” and populate that field with the appropriate district associated with the record. There is actually a third UDF for grouping as well.
UDFs 4 and 5 are different. They are designed for assigning a field that is unique to the record – for example a customer account number or birth date. You can assign two unique attributes to each record. As a bonus we also have a field already named unique record ID you can use to add a third attribute. Yay!
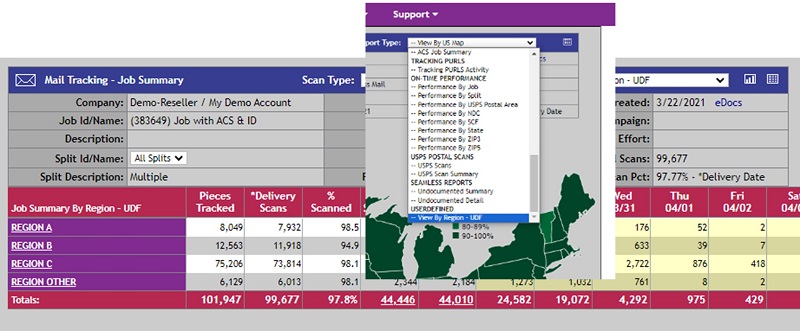
So, what are you doing with all these UDFs? For the grouping categories, you can generate reports shown by UDF. In the example below, the UDF is “Region.” The option to view by region appears in the drop-down menu:

Unique IDs, can be used to look up pieces by the selected attribute.
User Defined Fields are just one of the many options built into SnailWorks to allow you to customize the system to your needs. Want to learn how to set up User Defined Fields? Contact your Project Manager!